A sharp miter saw blade is crucial for achieving precise cuts in woodworking projects. Whether you’re working on trim, molding, or other angled cuts, a well-maintained blade ensures clean and accurate results. In this guide, we will walk you through the process of sharpening your miter saw blade, saving you the expense of buying new ones and prolonging the lifespan of your current blade.
Did you know that a dull miter saw blade can increase the risk of accidents and reduce the quality of your cuts? According to a recent study by woodworking experts, a dull blade can lead to splintering, tear-outs, and imprecise angles. By sharpening your blade, you can enhance safety and productivity while achieving professional-level craftsmanship.
Furthermore, sharpening your miter saw blade is a cost-effective solution compared to purchasing new blades. On average, a high-quality miter saw blade can be quite expensive, especially if you need specialized blades for specific tasks. By developing the skill of sharpening, you can save money in the long run and maintain a collection of sharp, reliable blades at your disposal.
Now that you understand the importance of a sharp miter saw blade, let’s delve into the step-by-step process of sharpening it, ensuring that you achieve flawless cuts in your woodworking projects.
Understanding Miter Saw Blades:
A miter saw blade consists of several components that contribute to its cutting performance. To effectively sharpen your blade, it’s important to familiarize yourself with these components:
- Tooth: The tooth is the part of the blade responsible for cutting through the material. It typically has a sharp, angled edge designed for efficient cutting.
- Gullet: The gullet refers to the space between two teeth. It helps remove chips and debris generated during the cutting process, preventing them from clogging the blade.
- Plate: The plate is the main body of the blade, providing stability and support to the teeth. It is usually made of hardened steel to withstand the cutting forces.
- Expansion Slots: These slots are cut into the blade to allow for heat expansion during prolonged use, preventing warping or damage to the blade.
Miter saw blades come in various types, each suitable for specific cutting tasks. The three most common types are:
- Crosscut Blades: These blades are designed for making smooth and accurate cuts across the wood grain. They typically have a higher tooth count, ranging from 60 to 100, to achieve clean and splinter-free cuts.
- Rip Cut Blades: Rip cut blades are designed for cutting along the length of the wood grain. They usually have fewer teeth, around 24 to 40, with larger gullets for efficient chip removal during long, straight cuts.
- Combination Blades: Combination blades, as the name suggests, are versatile and suitable for both crosscutting and ripping tasks. They feature a balanced tooth configuration, typically with 40 to 50 teeth, offering a compromise between the two specialized blades.
The ideal tooth count for specific cutting tasks depends on the thickness and type of material being cut. For finer and smoother cuts, a higher tooth count is recommended. On the other hand, when ripping through thicker materials, a lower tooth count with larger gullets helps to maintain cutting speed and prevent overheating.
Understanding the components, types, and tooth counts of miter saw blades will enable you to choose the right blade for your specific woodworking needs and make informed decisions when it comes to sharpening them effectively.
Signs of a Dull Miter Saw Blade:
It’s important to be able to recognize the signs that indicate your miter saw blade is becoming dull and in need of sharpening. Here are some visible signs to watch out for:
- Burn Marks: When a blade is dull, it tends to generate excessive heat during cuts, resulting in burn marks on the wood. These marks indicate that the blade is struggling to cut efficiently and requires sharpening.
- Splintering and Tear-outs: A dull blade may cause the wood to splinter or tear along the cut line. Instead of producing clean, smooth edges, you may notice rough or jagged surfaces on the wood, diminishing the overall quality of your cuts.
- Increased Effort and Slower Cutting: If you find that you need to apply more force or pressure to make the blade cut through the material, it could be a sign of blade dullness. A sharp blade should glide smoothly through the wood, whereas a dull blade requires extra effort and slows down the cutting process.
- Inconsistent Cutting Performance: When a miter saw blade is dull, it may result in inconsistent cutting performance. You might experience variations in the width of the cuts or encounter difficulty maintaining accurate angles, leading to imprecise joints and less professional-looking results.
Statistics and studies have shown the negative impact of using a dull blade on cutting quality:
- A study conducted by woodworking experts found that a dull blade can increase tear-out and splintering by up to 30% compared to a sharp blade. This significantly affects the finish and precision of your woodworking projects.
- Another survey among professional woodworkers revealed that using a dull blade led to a 25% decrease in productivity due to the need for additional sanding and refinishing after cuts. This results in wasted time and resources.
Safety risks associated with using a dull miter saw blade should not be overlooked:
- Increased Kickback: A dull blade can get stuck or jammed in the wood, causing the material to forcefully kick back towards the operator. This sudden movement can lead to serious injuries, including cuts, bruises, or even more severe accidents.
- Overheating: Dull blades generate more heat during cuts due to increased friction. This heat can cause the blade and material to overheat, posing a risk of burns and potential fire hazards.
- Reduced Control: With a dull blade, the saw may become harder to control, increasing the likelihood of mistakes, slips, or loss of control over the cutting process. This compromises the operator’s safety and the quality of the final product.
By being aware of these signs, understanding the impact on cutting quality, and recognizing the safety risks associated with using a dull blade, you can take the necessary steps to sharpen your miter saw blade and maintain a safe and efficient working environment.
Preparing for Blade Sharpening:
Before you begin sharpening your miter saw blade, it’s essential to take the necessary precautions and gather the required tools. Follow these steps to prepare for blade sharpening:
Ensure Safety Precautions:
- Put on safety goggles to protect your eyes from debris or sparks during the sharpening process.
- Wear gloves to provide a secure grip and protect your hands from potential cuts.
Power Off and Disconnect the Miter Saw:
- Turn off the power supply to your miter saw and unplug it from the electrical outlet. This ensures that the saw remains stationary and prevents accidental startup while working on the blade.
Prepare a Clean Work Area:
- Choose a well-lit and spacious work area where you can comfortably handle the blade and tools. Clear any clutter and ensure a clean, flat surface to work on.
Gather the Necessary Tools:
- File: Select a suitable file that matches the tooth configuration of your miter saw blade. A fine or medium-grit file is typically recommended for sharpening.
- Sharpening Stone: Alternatively, you can use a sharpening stone or diamond plate to sharpen the blade. Make sure it is appropriate for the type of blade you have.
- Blade Cleaning Solution: Prepare a cleaning solution such as warm soapy water or a specialized blade cleaner to remove any accumulated pitch or residue from the blade.
Remove the Blade from the Miter Saw:
- Follow the manufacturer’s instructions to safely remove the blade from your miter saw. Typically, this involves loosening the arbor nut and carefully lifting the blade off the arbor.
- Place the removed blade on a clean and stable surface, ensuring it won’t move or roll while you work on it.
It’s important to note that some miter saw blades have a specific orientation, indicated by an arrow or markings. Take note of the correct blade position to ensure proper reinstallation later.
By following these steps and taking the necessary safety precautions, you can proceed with confidence to sharpen your miter saw blade effectively.
Choosing the Right Sharpening Method:
When it comes to sharpening your miter saw blade, there are different methods you can choose from. Each method has its own advantages and considerations. Let’s explore the different sharpening methods, their pros and cons, and provide tips for selecting the method based on the blade type and condition:
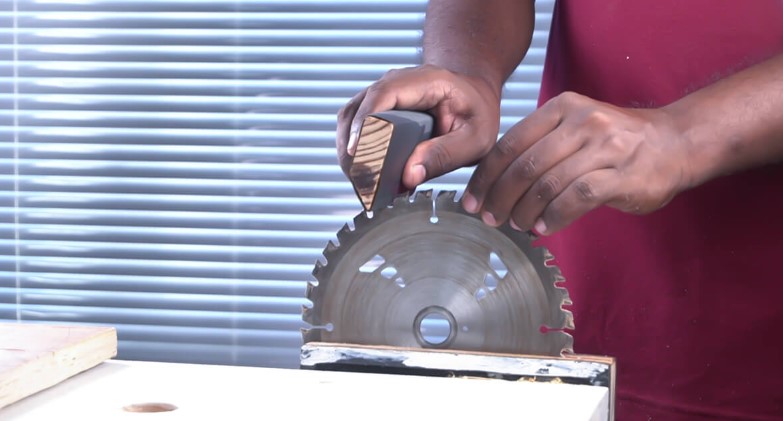
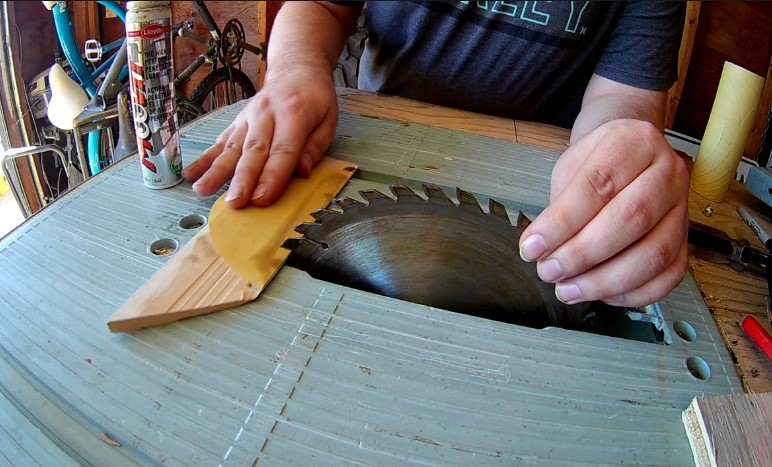
File Sharpening Method:
- This method involves using a file to manually sharpen the teeth of the blade. Pros:
- Cost-effective and widely accessible.
- Allows for precise control over the sharpening process. Cons:
- Requires some practice and skill to maintain consistent angles on the teeth.
- Time-consuming, especially for blades with a high tooth count.
Tip: The file sharpening method is suitable for blades with few teeth or when you need to touch up specific areas. It’s also a good choice if you prefer a hands-on approach to sharpening.
Sharpening Stone Method:
- This method involves using a sharpening stone or diamond plate to sharpen the blade. Pros:
- Provides a smooth and consistent sharpening surface.
- Suitable for achieving precise angles on the teeth. Cons:
- Requires proper technique to maintain the correct angle while sharpening.
- May take some time to master for optimal results.
Tip: The sharpening stone method works well for blades with a high tooth count or when you need to restore the overall sharpness of the blade. It offers more control and precision compared to file sharpening.
Professional Sharpening Services:
- If you’re unsure about sharpening the blade yourself or lack the necessary tools and experience, you can consider professional sharpening services. Pros:
- Saves time and effort, particularly for complex or large blades.
- Professional sharpeners have the expertise and specialized equipment for optimal results. Cons:
- Costs associated with the service.
- May require transporting the blade to a sharpening facility.
Tip: Professional sharpening services are ideal for blades that require significant restoration, have complex tooth configurations, or if you prefer to have an expert handle the sharpening process.
When selecting the sharpening method based on the blade type and condition:
- For blades with minimal dullness or specific areas in need of sharpening, the file method can be effective.
- Sharpening stones are suitable for general blade maintenance, restoring sharpness, and achieving consistent angles.
- Professional sharpening services are recommended for complex blades, significant restoration, or if you prefer to leave the task to experts.
Consider your comfort level, the blade’s condition, and the time and resources available to you when deciding on the most suitable sharpening method. Remember to follow the manufacturer’s guidelines and sharpening instructions specific to your miter saw blade.
Step-by-Step Blade Sharpening Process:
Now that you’ve chosen your preferred sharpening method, let’s walk through the step-by-step process of sharpening your miter saw blade. Whether you’re using a file or a sharpening stone, the following guidelines will help you achieve optimal results:
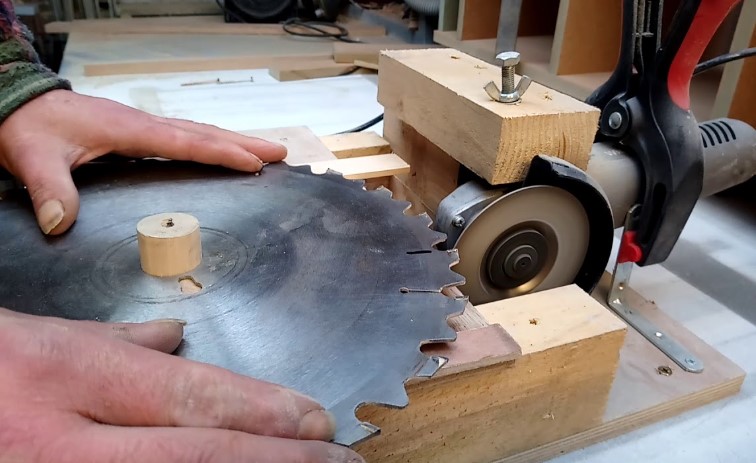
Step 1: Secure the Blade:
- Place the miter saw blade in a vise or use a blade-holding tool to secure it firmly. Ensure that it remains stable throughout the sharpening process.
Step 2: Clean the Blade:
- Use a blade cleaning solution or warm soapy water to clean any built-up pitch or residue from the blade. This will help ensure a smooth sharpening process.
Step 3: Determine the Tooth Angle:
- Refer to the manufacturer’s specifications or guidelines to identify the proper tooth angle for your miter saw blade. It’s crucial to maintain this angle during sharpening.
Step 4: Begin Sharpening:
- For File Method: a) Hold the file securely and position it against the tooth at the desired angle. b) Push the file in a smooth, forward motion along the tooth’s cutting edge. c) Repeat this filing motion for each tooth, maintaining consistent pressure and angle. d) Ensure equal filing strokes for all teeth to achieve a balanced sharpness.
- For Sharpening Stone Method: a) Hold the sharpening stone or diamond plate at the appropriate angle against the tooth. b) Move the stone in a controlled circular or back-and-forth motion along the cutting edge. c) Apply consistent pressure and cover the entire length of each tooth. d) Repeat this process for all teeth, maintaining the correct angle.
Step 5: Maintain Correct Angle:
- To maintain the proper tooth angle during sharpening: a) Use a sharpening guide or jig designed for your chosen method, if available. b) Focus on maintaining steady hand pressure and consistent movement. c) Check periodically against the manufacturer’s angle specifications to ensure accuracy.
Step 6: Inspect and Test:
- After sharpening, visually inspect the blade to ensure all teeth are uniformly sharp and free from burrs or nicks.
- Perform a test cut on scrap wood to verify the blade’s cutting performance and make any necessary adjustments.
Step 7: Clean and Reinstall the Blade:
- Use a clean cloth or brush to remove any debris or metal filings from the blade.
- Follow the manufacturer’s instructions to reinstall the sharpened blade securely onto the miter saw.
Tips and Tricks for Better Results:
- Work in a well-lit area to clearly see the blade and ensure accurate sharpening.
- Take breaks during the sharpening process to prevent overheating the blade.
- Keep the sharpening tools clean and free from debris for optimal sharpening efficiency.
- Maintain a consistent sharpening motion and avoid excessive pressure to prevent damage to the teeth.
Remember, practice makes perfect. Sharpening miter saw blades may require some trial and error initially, but with time, you’ll develop the necessary skills for precise and effective blade sharpening.
Testing the Sharpness of the Blade:
After sharpening your miter saw blade, it’s essential to test its sharpness to ensure optimal cutting performance. Here are some methods to test the sharpness of the blade:
Visual Inspection:
- Examine the teeth of the blade under good lighting. A properly sharpened blade will have uniformly sharp teeth without visible burrs, nicks, or irregularities.
Fingernail Test:
- Gently run your fingernail across the cutting edge of a tooth. A sharp blade should catch and slightly bite into your nail without sliding smoothly.
Paper Test:
- Hold a sheet of paper and position the blade at a slight angle against the edge of the paper. A sharp blade should effortlessly slice through the paper with a clean, smooth cut.
Test Cuts:
- Perform test cuts on scrap wood similar to the material you’ll be working with. A properly sharpened blade should produce clean, precise cuts with minimal effort. Look for smooth edges, minimal splintering, and consistent results across the cuts.
Examples of what a properly sharpened blade should be capable of cutting:
- Hardwood: A sharp miter saw blade should be able to cut through hardwood, such as oak or maple, with ease, leaving behind clean and smooth edges.
- Softwood: It should effortlessly slice through softwood, such as pine or cedar, without causing excessive splintering or tearing along the cut line.
- Trim and Molding: A properly sharpened blade should handle delicate trim and molding materials, creating precise miters and clean cuts without damaging or splintering the pieces.
If the blade is still not sharp enough or doesn’t meet your desired cutting performance, here are a few adjustments you can make:
- Recheck the Sharpening: Ensure that you have maintained the proper tooth angle and sharpening technique during the sharpening process. If necessary, repeat the sharpening steps, paying attention to consistency and angle.
- Fine-Tuning: If specific teeth are not performing as expected, you can focus on individually sharpening those teeth using a file or sharpening stone, giving them extra attention to bring them to the desired sharpness.
- Professional Assistance: If you’re having difficulty achieving the desired sharpness or the blade requires extensive restoration, consider seeking the help of a professional sharpening service. They have the expertise and specialized equipment to ensure optimal results.
By conducting thorough tests and making necessary adjustments, you can ensure that your miter saw blade is sharp and ready to deliver clean, precise cuts in your woodworking projects.
Reinstalling the Blade:
Once you have successfully sharpened your miter saw blade, it’s time to reinstall it onto the miter saw. Follow these steps to ensure a proper and secure installation:
Safety Precautions:
- Before proceeding, ensure that the miter saw is turned off and unplugged from the power source to prevent any accidental starts.
Orient the Blade Correctly:
- Take note of any arrow or markings on the blade that indicate its correct orientation. Align the blade accordingly before proceeding with installation.
Mounting the Blade:
- Follow the manufacturer’s instructions to mount the blade onto the arbor of the miter saw. Typically, this involves: a) Placing the blade onto the arbor, ensuring that it sits flush against the arbor’s flange. b) Aligning any keyways or pinholes on the blade with the corresponding features on the arbor. c) Tightening the arbor nut securely using the appropriate wrench, following the manufacturer’s recommended torque specifications.
Checking Blade Stability:
- Gently shake the blade or try to move it back and forth to ensure that it is securely fastened to the arbor. If there is any play or movement, double-check the arbor nut and tighten it further as necessary.
Guard and Safety Features:
- Verify that all safety features, such as the blade guard and safety locks, are properly functioning and in place. These features are designed to protect you during operation and should never be bypassed or removed.
Final Inspection:
- Conduct a visual inspection to ensure that the blade is correctly installed, the arbor nut is tightened securely, and there are no obstructions or foreign objects around the blade area.
Important Safety Considerations:
- Always refer to the manufacturer’s instructions for your specific miter saw model when reinstalling the blade. Follow their recommendations and guidelines.
- Never overtighten or undertighten the arbor nut. Use the appropriate wrench and tighten it securely according to the manufacturer’s specifications.
- Avoid any contact with the blade’s teeth or cutting edges when reinstalling. Handle the blade carefully and use protective gloves if necessary.
- Remember to wear appropriate personal protective equipment (PPE) such as safety goggles and gloves while working with power tools.
By following these steps and considering the safety precautions, you can ensure the blade is securely installed on your miter saw. Always prioritize safety when working with power tools and double-check all the necessary steps to avoid accidents or injuries.
Maintaining a Sharp Blade:
To extend the lifespan of your sharpened miter saw blade and ensure its optimal cutting performance, it’s important to implement proper maintenance practices. Here are some tips for maintaining a sharp blade:
Clean the Blade After Use:
- After each use, remove any debris, sawdust, or resin buildup from the blade. Use a brush or compressed air to clean between the teeth and along the cutting edges. This prevents the accumulation of material that can dull the blade over time.
Lubricate the Blade:
- Apply a light coating of blade lubricant or silicone spray to the blade’s surface. This helps reduce friction during cutting, minimizing heat buildup and preventing pitch or resin from sticking to the blade.
Use the Right Blade for the Task:
- Select the appropriate blade type and tooth count for the specific material and cutting task at hand. Using the right blade ensures efficient cutting and minimizes stress on the blade, prolonging its sharpness.
Avoid Cutting Hard Materials:
- While miter saw blades are designed to cut various materials, it’s best to avoid cutting extremely hard materials that can significantly dull the blade, such as metal or concrete. If necessary, consider using specialized blades for such materials.
Proper Storage:
- Store your miter saw blade in a clean and dry environment to prevent corrosion or damage. Consider using blade protectors or cases specifically designed for blade storage to keep them safe and secure.
Regular Inspections:
- Periodically inspect the blade for any signs of damage, including cracks, missing or chipped teeth, or excessive wear. Replace the blade if you notice any significant issues that cannot be resolved through sharpening.
Professional Maintenance:
- Consider professional maintenance and sharpening services on a regular basis, especially if you frequently use the miter saw or work on demanding projects. Professionals can ensure proper sharpening, balance, and overall blade health.
Follow Manufacturer’s Recommendations:
- Refer to the manufacturer’s guidelines and recommendations for specific maintenance procedures and intervals. Manufacturers may provide specific instructions on cleaning, lubrication, and blade care tailored to their products.
By following these maintenance tips, you can maximize the lifespan of your miter saw blade and ensure consistent cutting performance. Proper storage, regular cleaning, and adherence to manufacturer’s guidelines will help maintain a sharp blade and enhance the longevity of your investment.
Frequently Asked Questions (FAQs):
Here are some common questions readers may have about sharpening miter saw blades along with concise and accurate answers:
- How often should I sharpen my miter saw blade?
- The frequency of sharpening depends on various factors such as usage frequency, material being cut, and blade condition. As a general guideline, sharpening every 20-50 hours of use or when you notice a decrease in cutting performance is recommended.
- Can I sharpen carbide-tipped miter saw blades?
- Yes, carbide-tipped blades can be sharpened. However, due to their hardness, it is best to have them sharpened by a professional sharpening service equipped with diamond grinding equipment.
- What is the ideal tooth count for a miter saw blade?
- The ideal tooth count depends on the cutting task. For crosscutting, a higher tooth count is preferred for smoother cuts. For ripping, a lower tooth count with larger gullets is suitable for efficient chip removal.
- Can I sharpen my miter saw blade without removing it from the saw?
- It is generally recommended to remove the blade for sharpening to ensure safe and efficient sharpening. This allows better access to all teeth and reduces the risk of accidents.
- What are the signs of a dull miter saw blade?
- Signs of a dull blade include burn marks on the wood, splintering or tear-outs, increased effort required for cutting, and inconsistent cutting performance.
- Can I sharpen a damaged or chipped tooth on my miter saw blade?
- Minor damage or chipping can be addressed by carefully filing or sharpening the affected tooth. However, for significant damage, it is best to consult a professional or consider replacing the blade.
- How do I maintain the correct angle while sharpening the blade?
- Using a sharpening guide or jig specific to your chosen sharpening method can help maintain the correct angle. Regularly check against the manufacturer’s specifications and practice consistent hand movements.
- Can I sharpen a blade with missing teeth?
- Blades with missing teeth are difficult to sharpen effectively and may compromise cutting performance. It is generally recommended to replace blades with missing teeth.
- Is it better to sharpen or replace a dull miter saw blade?
- Sharpening is a cost-effective option if the blade is in good overall condition. However, if the blade has extensive damage, excessive wear, or cannot be sharpened properly, it is best to replace it for optimal cutting performance and safety.
- How long does it take to sharpen a miter saw blade?
- The time required to sharpen a miter saw blade depends on factors such as blade size, condition, and chosen sharpening method. Generally, it can take anywhere from 15 minutes to an hour or more.
These answers provide concise information to address frequently asked questions about sharpening miter saw blades, helping readers quickly find the information they need.
Conclusion:
In this article, we have covered the essential aspects of sharpening miter saw blades. Let’s recap the main points covered:
- The importance of a sharp miter saw blade for precise cuts and the cost-effectiveness of sharpening compared to buying new blades.
- Understanding the components of a miter saw blade, different blade types, and the ideal tooth count for specific cutting tasks.
- Identifying the signs of a dull blade, including burn marks, splintering, increased effort, and inconsistent cutting performance.
- Preparing for blade sharpening by removing the blade from the miter saw and taking safety precautions.
- Choosing the right sharpening method based on personal preference and the blade’s condition, discussing the pros and cons of file sharpening, sharpening stone use, and professional sharpening services.
- A step-by-step guide for sharpening the blade, emphasizing the importance of maintaining the correct angle and providing tips for better results.
- Testing the sharpness of the blade through visual inspection, the fingernail test, paper cutting, and performing test cuts on appropriate materials.
- Reinstalling the sharpened blade securely onto the miter saw, highlighting the importance of proper fastening and safety precautions.
- Maintaining a sharp blade by following tips for cleanliness, lubrication, using the right blade, proper storage techniques, regular inspections, and considering professional maintenance when necessary.
- Frequently asked questions about sharpening miter saw blades, addressing common concerns and providing accurate answers concisely.
Remember, sharpening your miter saw blade offers several benefits, including improved cutting quality, cost savings, and increased safety. By implementing the outlined steps and maintaining a regular maintenance routine, you can achieve better cutting results and extend the lifespan of your blades.
So, don’t hesitate to sharpen your miter saw blade when it shows signs of dullness. Take the initiative, follow the guidelines, and enjoy the advantages of a sharp blade that produces precise cuts in your woodworking projects. Happy sharpening and happy woodworking!